Pumpkin Bread and a Lesson in Reading Recipe Comments
 [Jump right to the recipe: Pumpkin Bread]
Early this fall, my company’s resident baker brought in a wonderful loaf of pumpkin bread in an attempt to fatten up our staff. I was of course more than happy to partake of her bread, seeing as I love pumpkin in wholly unwholesome ways. I immediately asked for the recipe, assuming that as the bread was a quick bread the recipe would be devoid of yeast and therefore a strong candidate for something I could bake without totally screwing it up.
Note: I’m determined to conquer my fear of baking. I’ve purchased Healthy Bread in Five Minutes a Day, joined a Google Group, and will be producing loaves of bread very soon. I plan to blog along the way, so look for future posts on how I’m becoming a (hopefully) decent baker. Now, back to our regularly scheduled blog post…
It turns out that Katie’s excellent bread was according to a Food Network recipe. As I reviewed the recipe, I noticed the that it has close to 100 comments and a range of ratings covering the whole spectrum from 1 star to 5. Reading the responses I discovered that the basic recipe seems to be flawed, at least in cooking time, and that it might be too sweet. In general, it seemed that results with the recipe were all over the map. I probably spent an hour reading the comments and thinking about how to assimilate them into my attempt. Along the way, the content geek in my realized that one of the reasons I love recipes stored electronically with tools for reviews and comments is because it allows everyone to contribute to and take advantage of the shared experience of making the recipe. We make the recipe better and improve our own cooking skills along the way. Group wisdom rocks!
I’m very happy with my pumpkin bread, and I’m sure there’s a chance I wouldn’t be if I’d gone right along with the recipe and not stopped to tap the wisdom of the crowd. As much as this is my adaptation of the recipe, it’s absolutely a product of the group of cooks who made it before me and took the time to comment. They validated my ideas about substitutions of applesauce for part of the oil and whole wheat flour for the AP flour. They recommended reducing the sugar and warned that the spices as written might lead to a bland bread. Finally, they helped me not panic when my bread was far from done in 40 minutes.
I can honestly say that this recipe is a shared creation. I hope you enjoy the resulting recipe and share your modifications with me in the comments.
Recipe: Pumpkin Bread
Adapted from Pumpkin Bread by Cathy Lowe.
Details
- Difficulty: Easy
- Makes: 2 loaves, 12 slices each
- Prep Time: 40 min
- Cook Time: 60 min
- Weight Watchers Points: 4/slice
Ingredients
- 1 c. brown sugar
- 1.5 c. granulated sugar
- 4 oz. apple sauce
- 1/2 c. vegetable oil
- 4 eggs, lightly beaten
- 1 15oz. can pumpkin puree
- 1 c. whole wheat flour
- 2.5 c. AP flour
- 2 tsp. salt
- 2 tsp. baking soda
- 1 tsp. baking powder
- 1 teaspoon freshly ground nutmeg (1.5 tsp if not fresh)
- 1.5 tsp. ground allspice
- 1.5 tsp. ground cinnamon (recommend Saigon)
- 3/4 tsp. ground cloves
- 2/3 c. water
Instructions
- Preheat oven to 350.
- Spray 2 9×5 loaf pans with flour baking spray (such as Baker’s Joy).
- In a large mixing bowl, combine the brown sugar and granulated sugar; break up any clumps of brown sugar.
- Stir in the apple sauce and vegetable oil.
- Stir in the eggs and pumpkin.
- In a separate bowl, whisk together all of the dry ingredients (wheat flour through cloves).
- Stir the dry ingredients and water into the wet ingredients in alternating batches, starting and ending with flour.
- Divide the batter between prepared pans. There should be 1 – 1.5 inches of space left at the top of the pans for the loaves to expand.
- Set pans on a foil-lined baking sheet and place in oven.
- Bake for 50-60 minutes or until a cake tester comes out clean.
- Remove the loaf pans from the oven and let the loaves rest in the pans on a cooling rack for 10 minutes.
- Turn the loaves out of their pans and let cool completely on the rack.
Recipe for Success
- This recipe will work in just about any shape pan, from the loaf pans I used to a bunt pan or even mini-loaf pans and muffin tins. You’ll have to adjust the cooking time depending on the size of your pan. For mini-loaf pans and muffin tins I would start checking for doneness at 25-30 minutes. A whole loaf baked in a bunt pan may take upwards of 75 minutes, but I would still start checking around 50 minutes just in case.
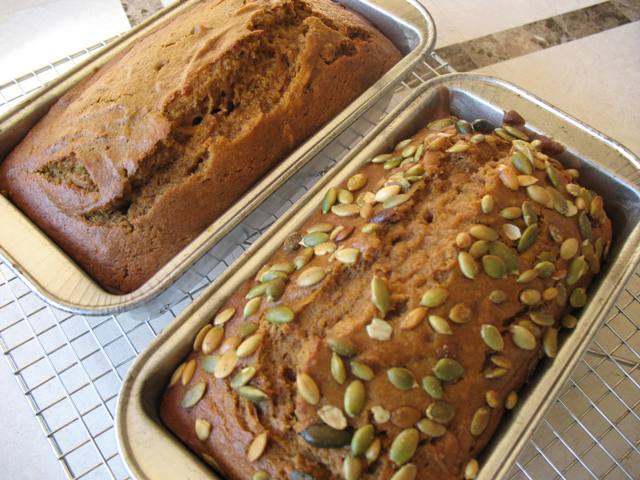
- The recipe reviewers offered a whole host of suggestions for mix-ins: chocolate chips, walnuts, pecans, and dried cranberries just to name a few. I took one of their suggestions and topped one of my loaves with roasted pumpkin seeds which not only makes for a pretty presentation but adds a lovely crunch to the loaf’s crust. For those of you counting Weight Watcher’s Points out there, remember that adding mix-ins will increase the points per slice.
- If your loaves are starting to look overly-brown at about 40 or 50 minutes in the oven, cover them loosely with aluminum foil.

 Learn more about pumpkin
Oh I am SO with you with reading the comments on sites like that. Many times it has saved me